Getting started with Trigraphy
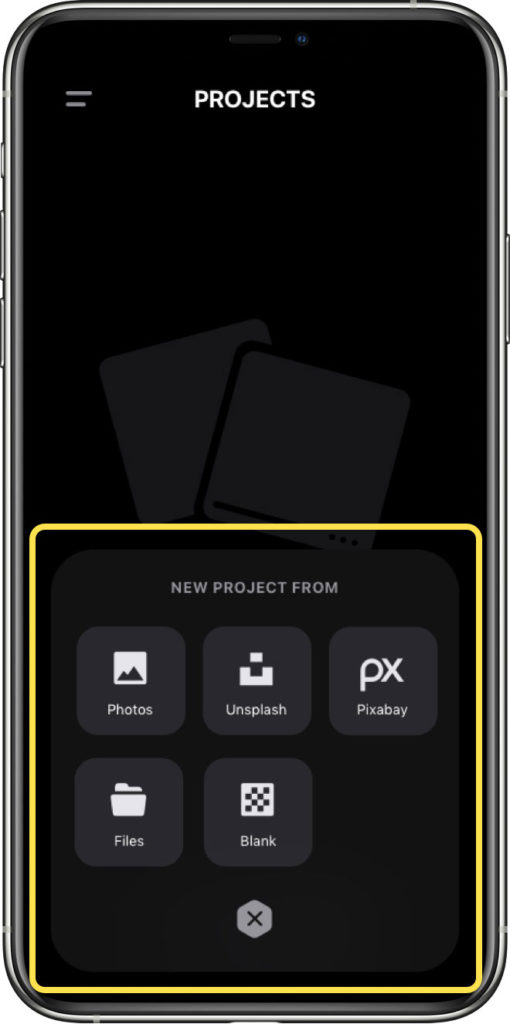
To start a new project tap on NEW PROJECT.
You can chose from 3 options:
Photos – Start with a photo from the Photos app.
Files – Start with a file from the Files app. Including exported projects as a .tri file.
Blank – Start with a blank canvas.
Starting from Photos & Files creates a canvas with the size of the imported image while if you start from Blank you set the size of the canvas.
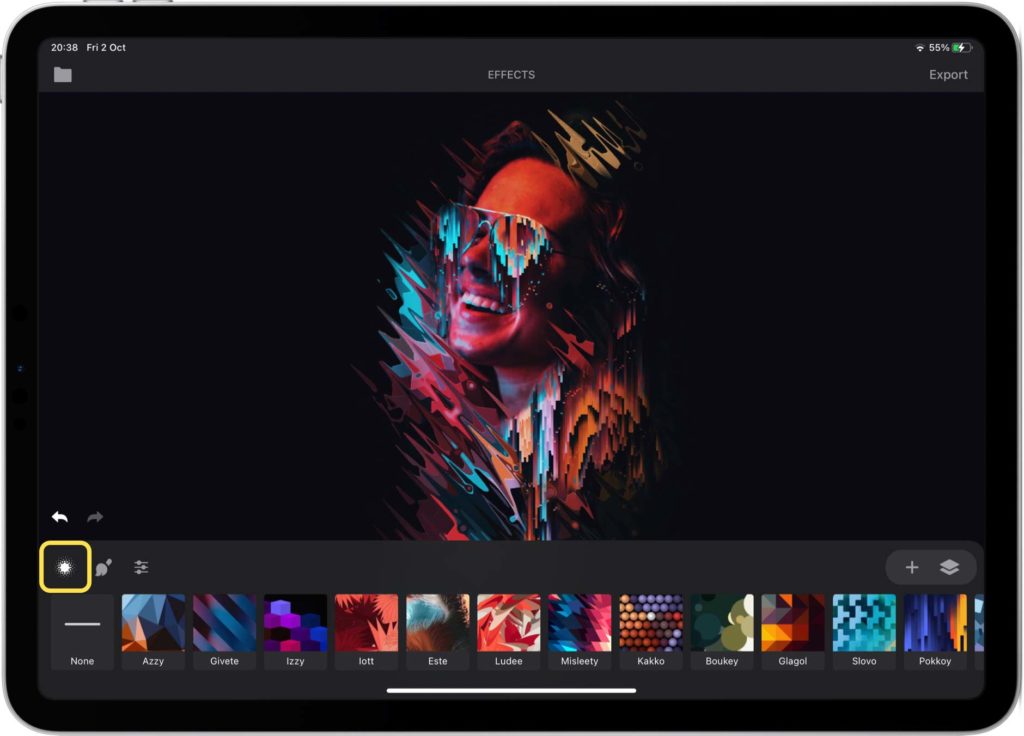
The effects are algorithms that redraw the image based on the colors and/or the shapes of the objects. Each effect has different set of presets and settings. Effects can be applied only to image layers.
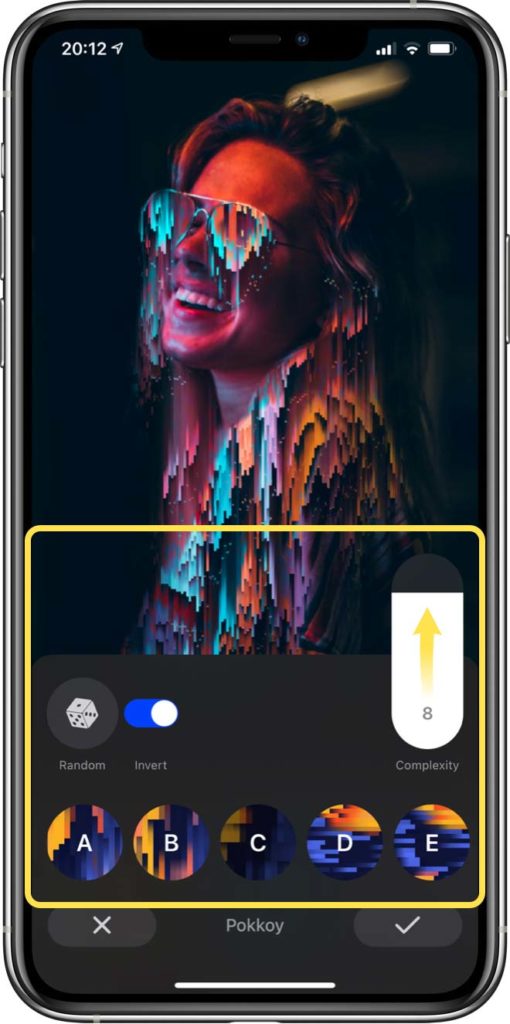
Settings
To change a primary setting tap on and then drag to the desired value. Based on the effect you might need to wait a bit of the new result to be calculated. The number of primary settings may be different for other effects.
To change the secondary setting tap on the switch . This setting is usually more fundamental and switches between two behaviours of the effects. In the shown example the setting “Invert” switches between light to dark or dark to light pixel order. Some effects don’t have a secondary setting.
Some effects have “reloadable” presets. You can identify them by the icon. These presets will give different result every time. To reload a preset just tap it again.
You can also tap on to get a random preset with random settings. It’s great way to get a surprising result if you don’t know what you are after.

Presets
Each preset has its own way of drawing the image. This means that each preset can be very different from the others and the settings might have different effect on it.
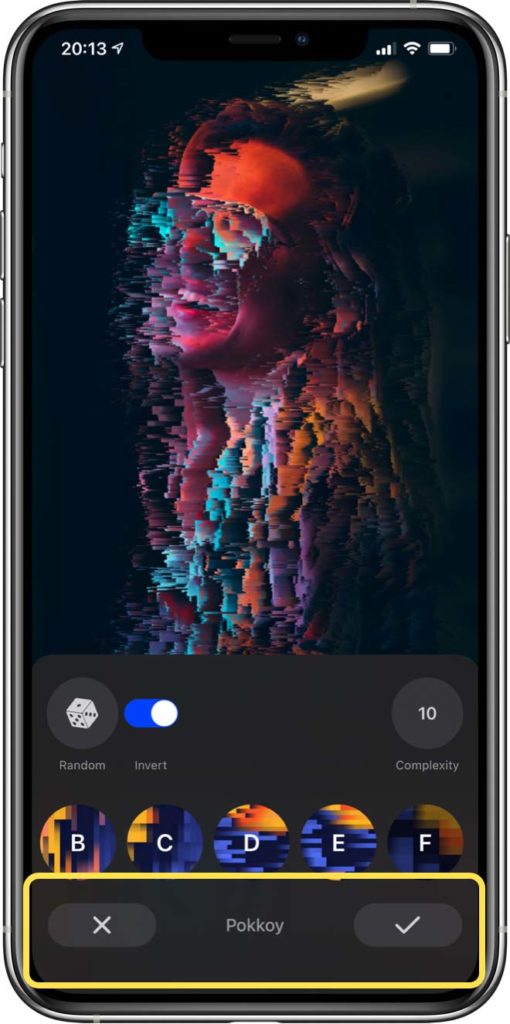
Apply or Discard Changes
To discard the
changes tap on:
To confirm the
changes tap on:
Confirming the change will set the newly generated image as the image layer. This means that all future operations will be applied to the new image and not the original one.
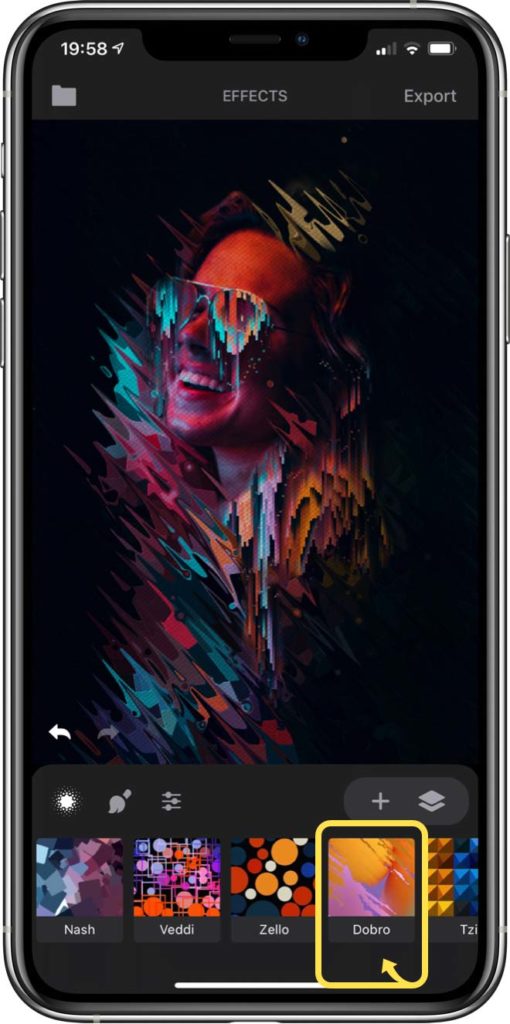
Combining Effects
After confirming an effect selecting another one will apply it on top. This way you can create unlimited effects combinations.
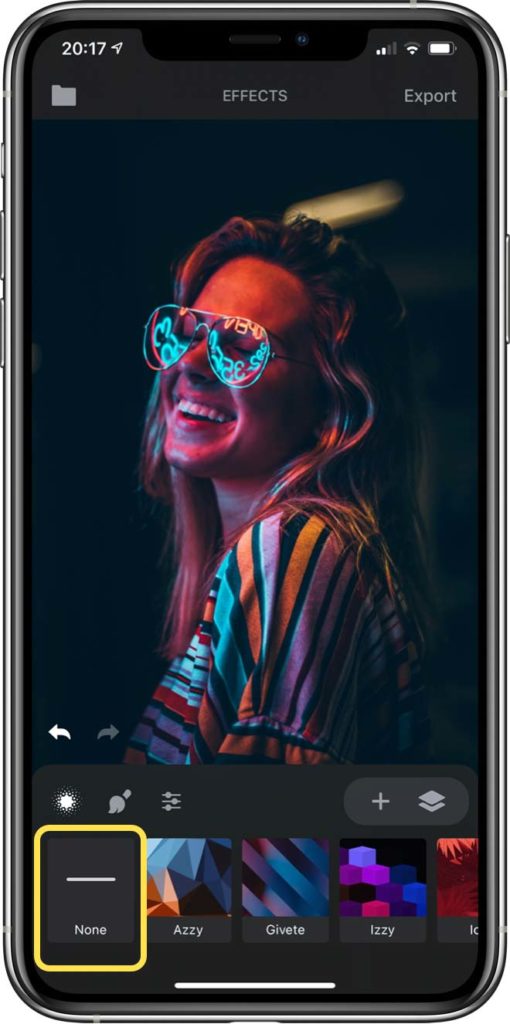
Restoring Original Image
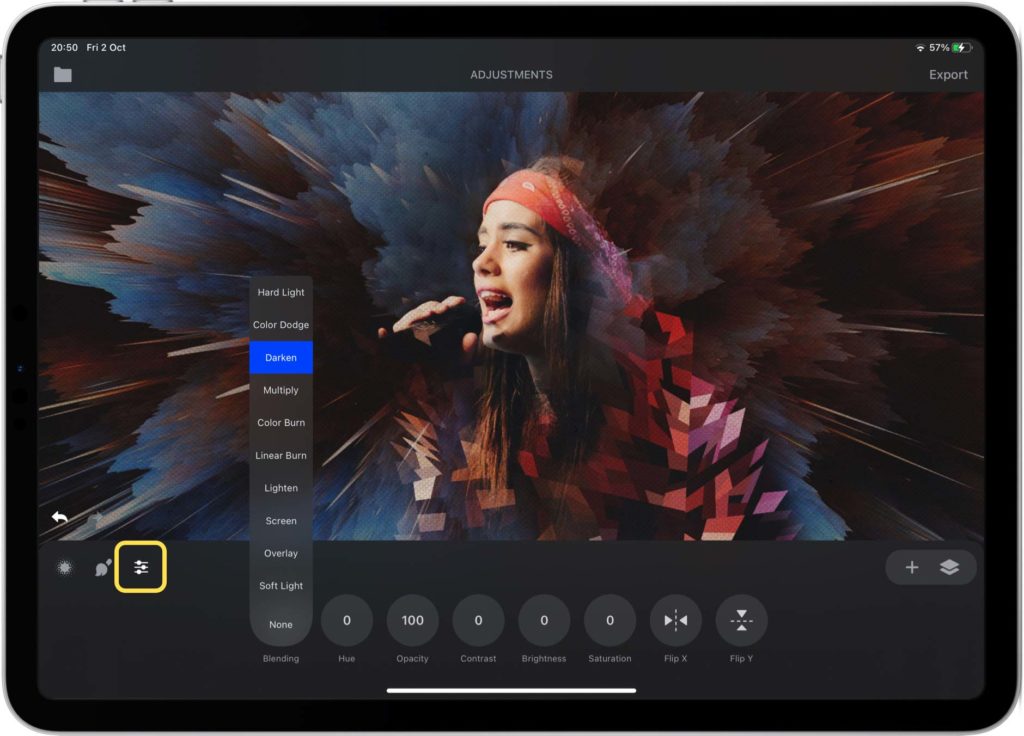
Every layer type has a set of adjustments. These are settings that affect color, position or blending of the layer. Names of the settings should be self-explanatory, but in case you don’t know what a setting does just experiment with it.
With layers you have the freedom to combine and blend many images in one masterpiece.
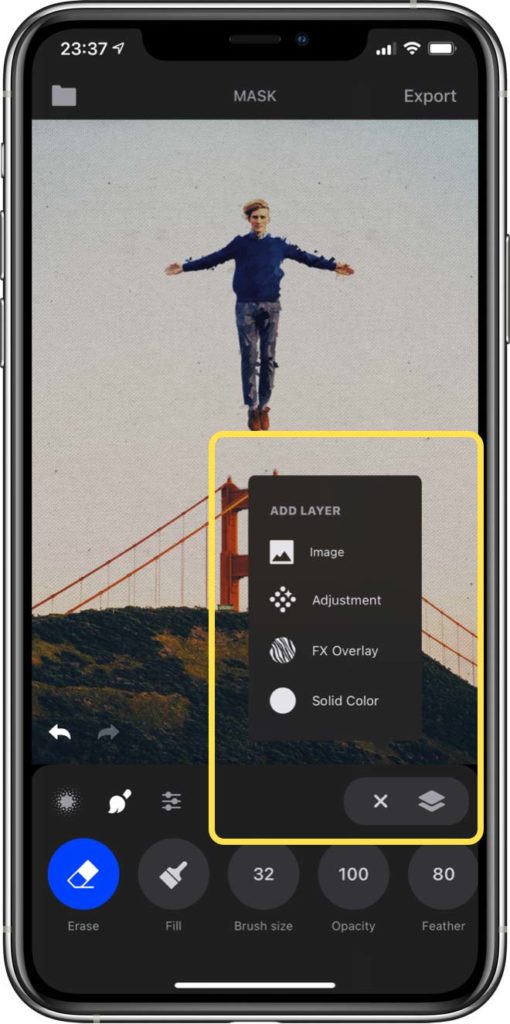
Adding New Layer
To add а new layer tap on
There are 4 types of layers:
- Image – Add image layer from Photos, Files, Unsplash or Pixabay
- Adjustment – Layer used to apply color filter, texture or canvas-wide color adjustments
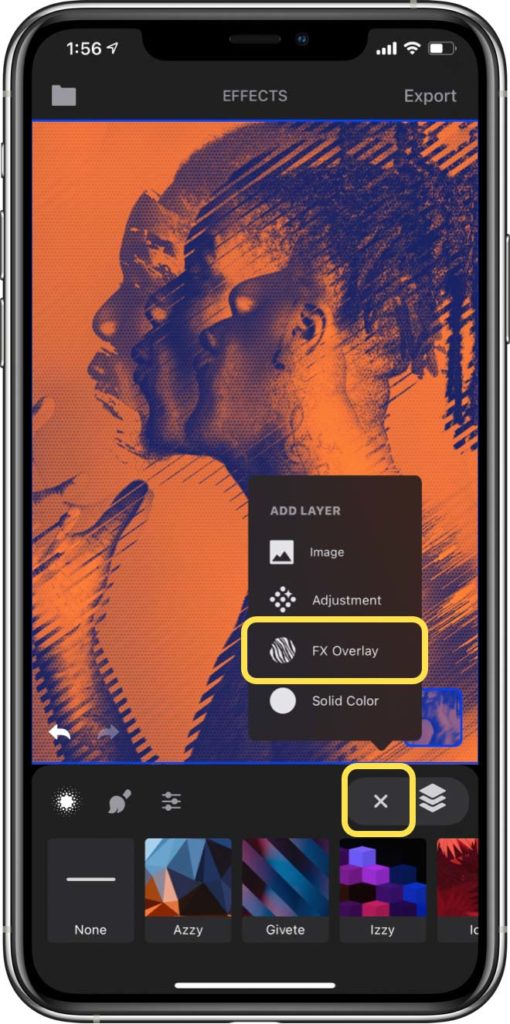
- FX Overlay – Specially curated gallery of abstract canvas-wide overlays
- Solid Color – Solid color layer. Used to block out shapes, add background color and others.
You can add up to 12 layers. If the imported layer is very large the app will ask you if you want to resize it.
Layer Options
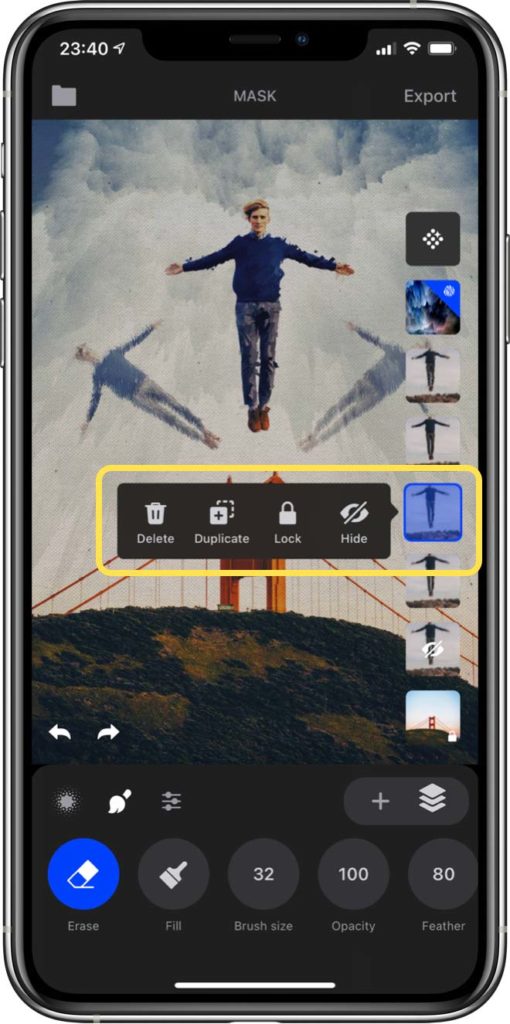
To open the layer options tap again on the thumbnail of the selected layer. Selected layer has a blue border and tint.
- Delete – Removes the layer from the canvas
- Duplicate – Copies the layer with all of its settings (this includes effects) above the current layer
- Lock/Unlock – Locks/unlocks the layer so that you can’t accidentally select it while tapping on the canvas.
- Hide/Unhide – Hides/unhides the layer from the canvas
Hiding Layers Panel
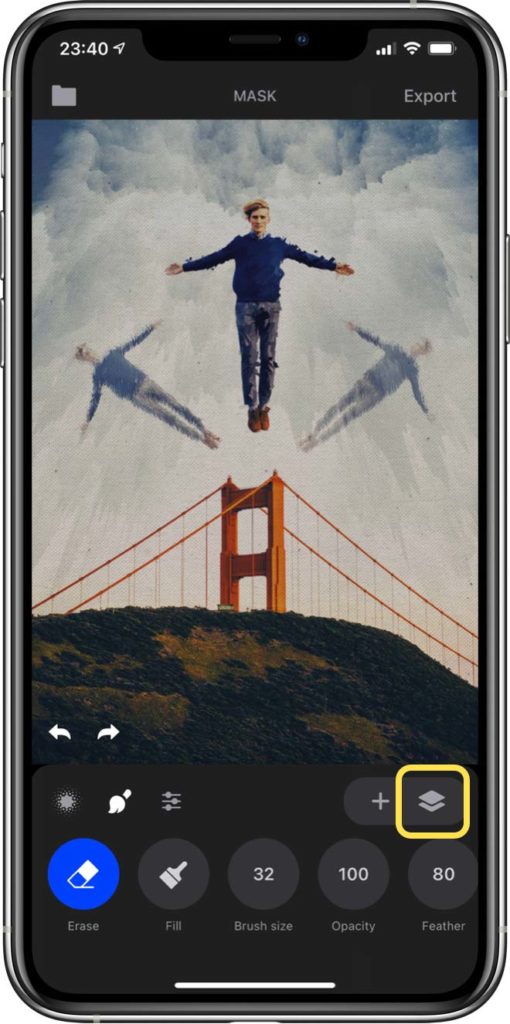
Tap on to hide the layers panel and get more area to work on. To show the layers panel just tap the icon again.
Changing Layers Order
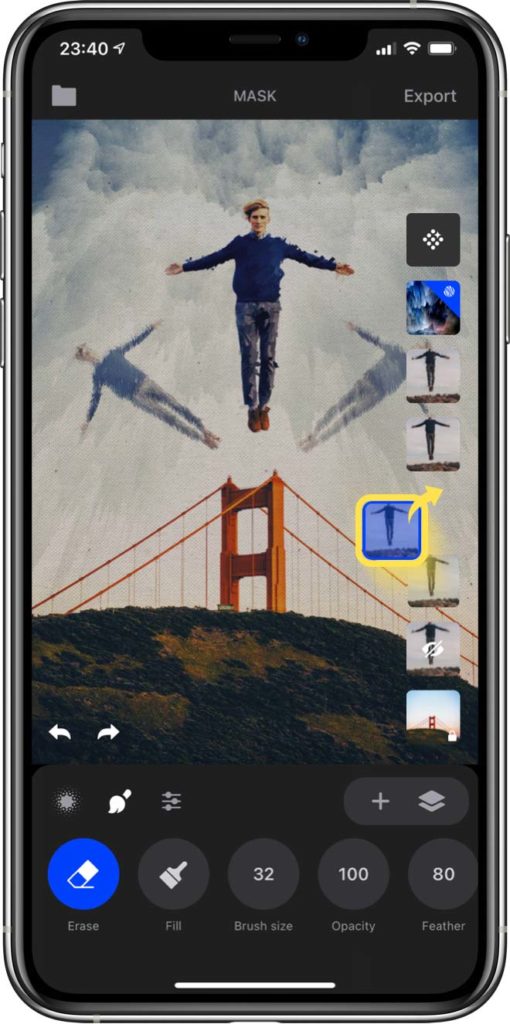
To change which layer is above or below tap and hold the layer’s thumbnail until you feel a slight vibration or you see the layer pop. Then you can move it to a new position in the layers panel.
Moving and Scaling Layers
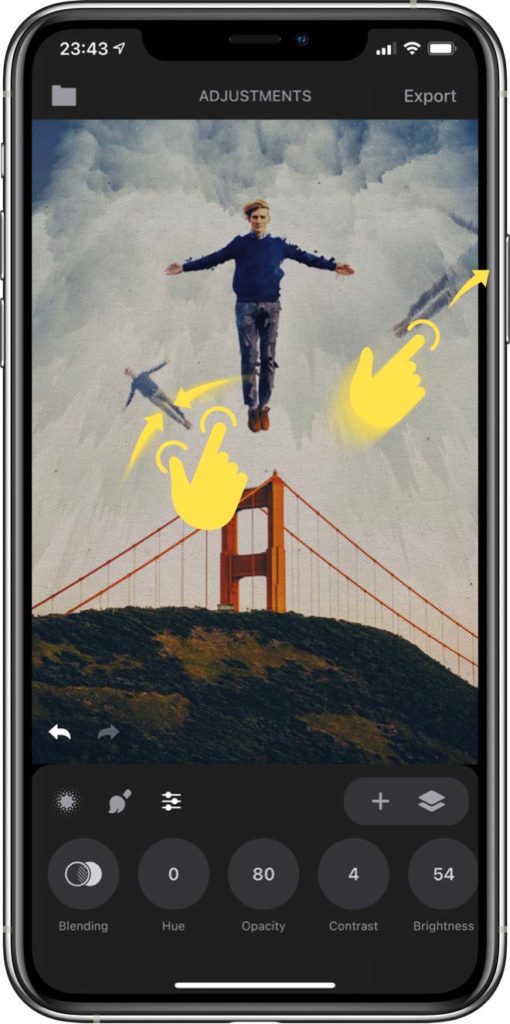
To move, scale and rotate a layer it has to be selected and have a blue border around it. Image layers and Solid Color layers can be transformed while the adjustment menu is selected. FX Overlay layer and Adjustment layer can’t be moved or scaled.
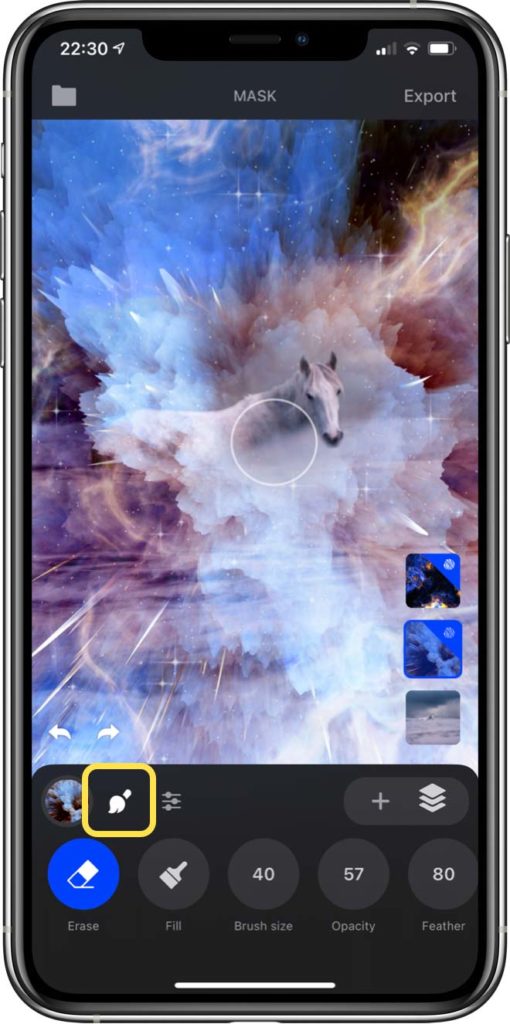
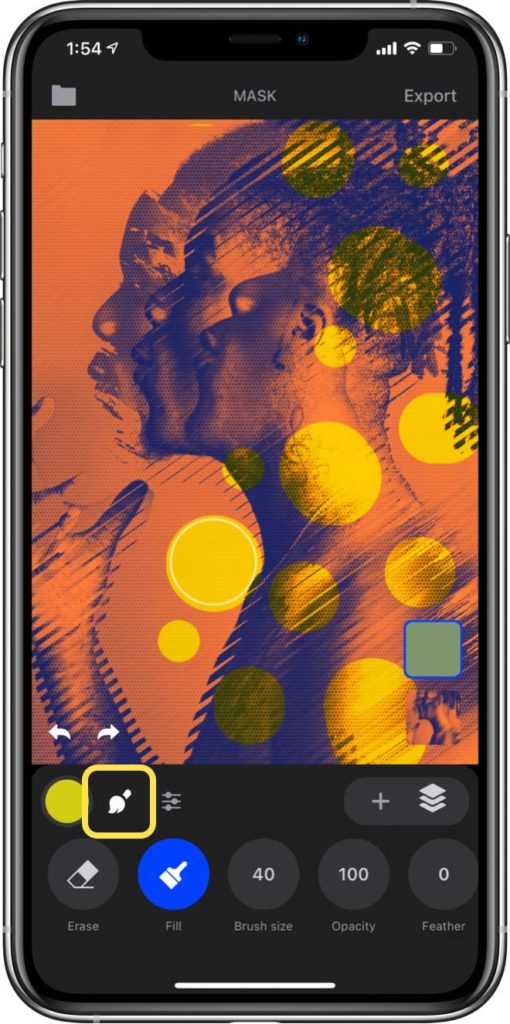
The mask is available for every layer and the settings are the same. It allows you to erase parts of the selected layer and reveal the layers below. The mask is a very powerful tool to mix and compose many layers.
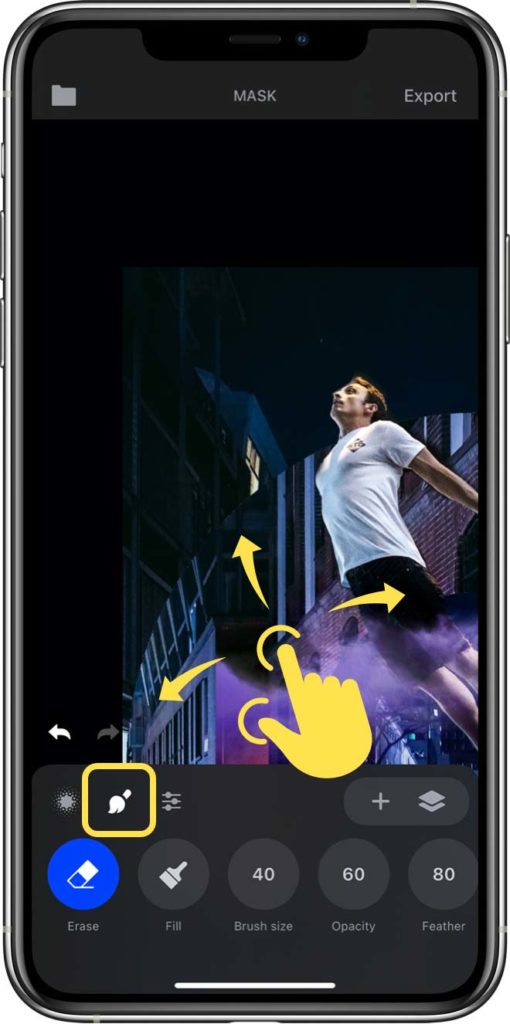
Moving the Canvas
While using the mask you can use two fingers to pan and pinch the canvas.
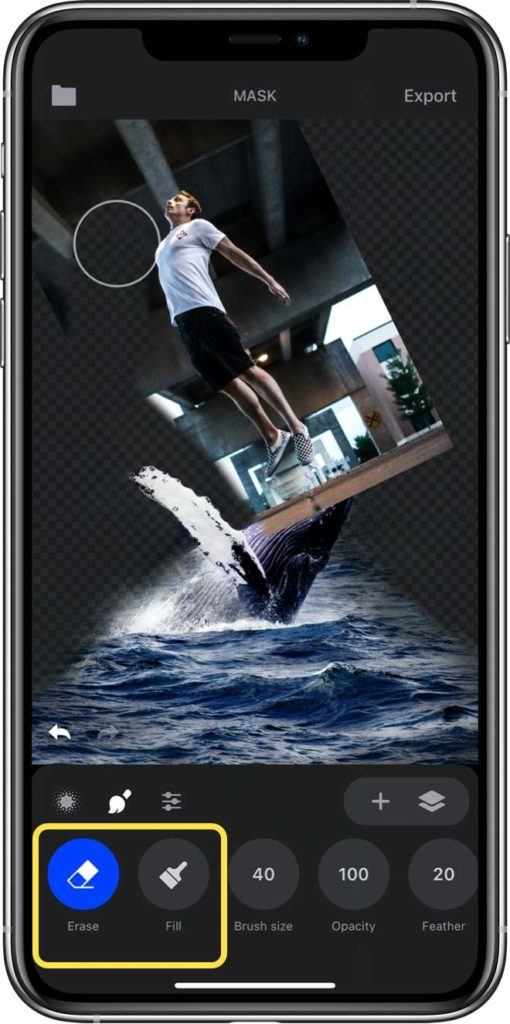
Modes
- Erase – Use it to erase parts of the layer and reveal the layers below
- Fill – Use it to restore parts of the layer
- Clear – Clears any mask drawn. It’s like using fill on the entire layer.
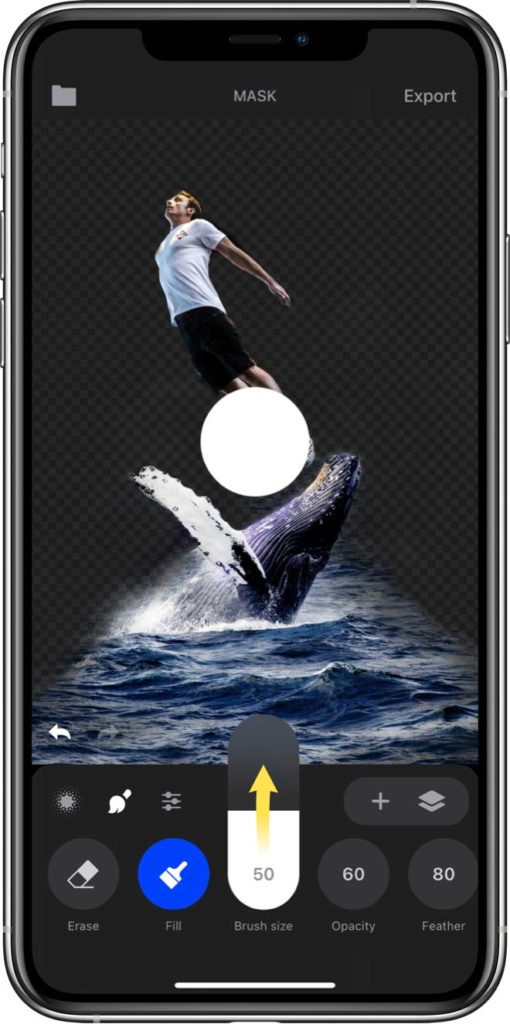
Settings
As with every other setting to change it tap on it and slide your finger to the desired value.
Brush size – The size of the brush. You can see a live preview on the canvas of how large the brush will be.
Opacity – How transparent is the brush.
Feather – 0 feather will give you a brush with hard edge while setting it to 100 will make a very soft brush.
Tip: How to erase part of the effect and show the original image
To replicate the behaviour of the mask from Trigraphy 3 follow these steps:
1. Tap on the layer’s thumbnail and select “Duplicate” .
2. You will see two identical layers in the layers panel. Tap on the top one.
3. Select the effect that you want and confirm it.
4. Now select the mask and erase the parts of the effect that you wish.
With the Adjustment layer you can apply different color filters, add detail with textures or change things like contrast. The adjustment layer affects all layers below it. Adjustment layer is a quick and easy way to change the feeling of the entire artwork.
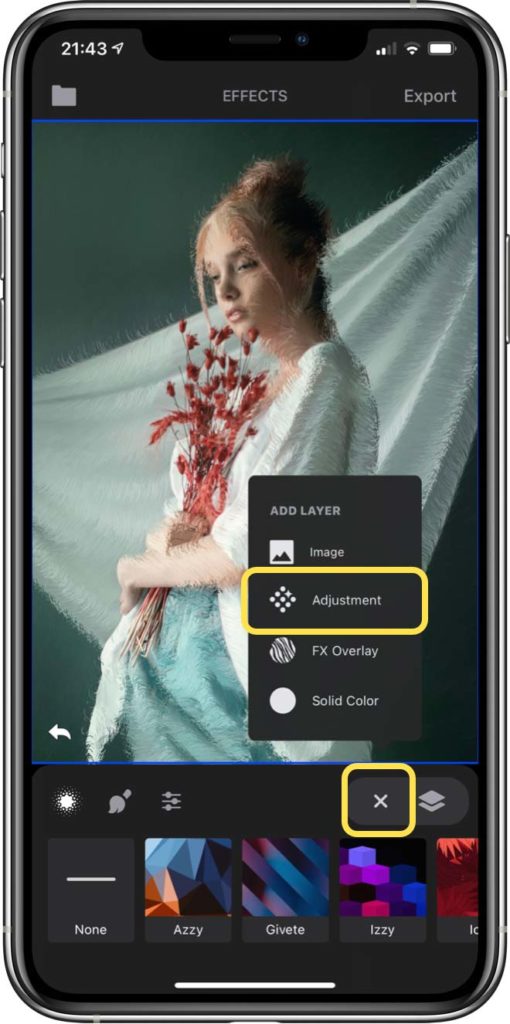
Adding
To add an Adjustment layer tap on and then select Adjustment
.
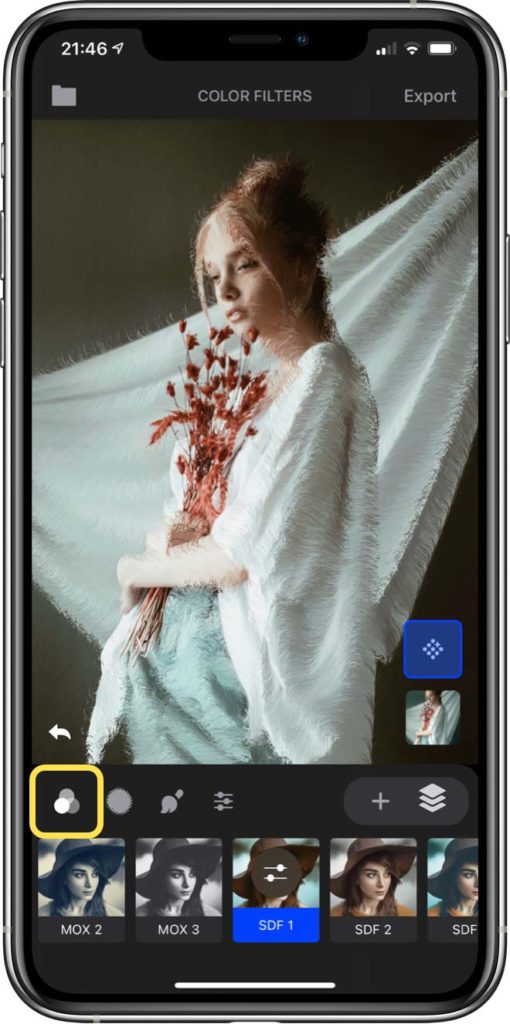
Color Filters
With the color filters you can quickly change the mood of your image, make it monochrome or duotone.
Each filter has an intensity setting which controls how much color change is applied. To access the intensity setting tap a second time on an already selected filter ( ).
To remove the applied filter from the layer select “None”
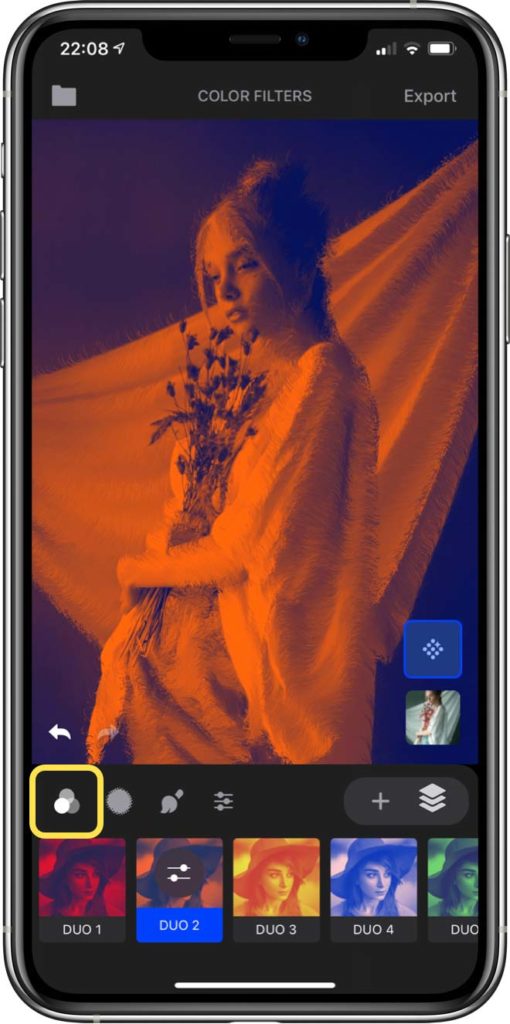
Duotone
You can find the duotone color filters at the end of the filters list. Duotones behave like every other color filter. You can change the intensity by tapping a second time on an already selected filter ( ).
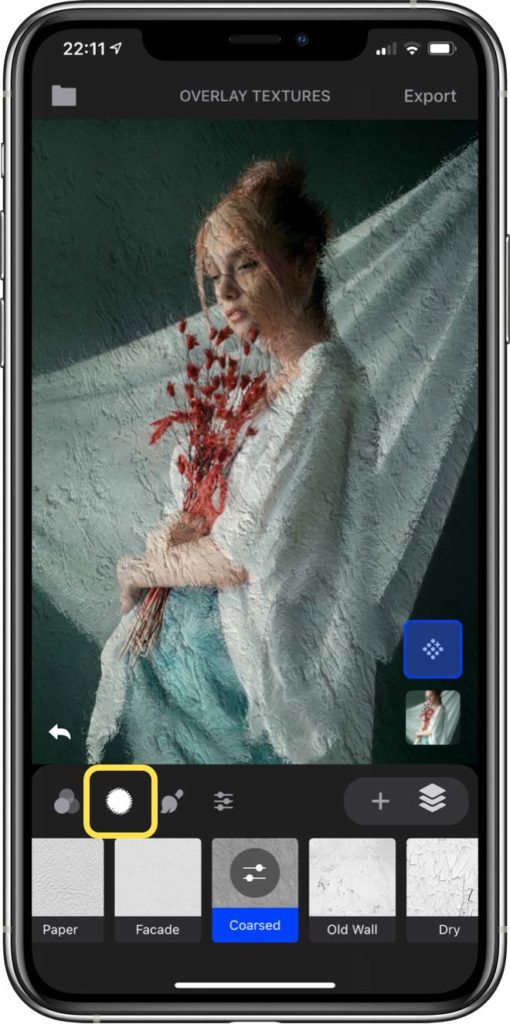
Textures
With the textures you can add fine or coarse details.
Each texture has an intensity setting which controls how much texture is blended with the image. To access the intensity setting tap a second time on an already selected texture ( ).
To remove the texture from the adjustment layer select “None”
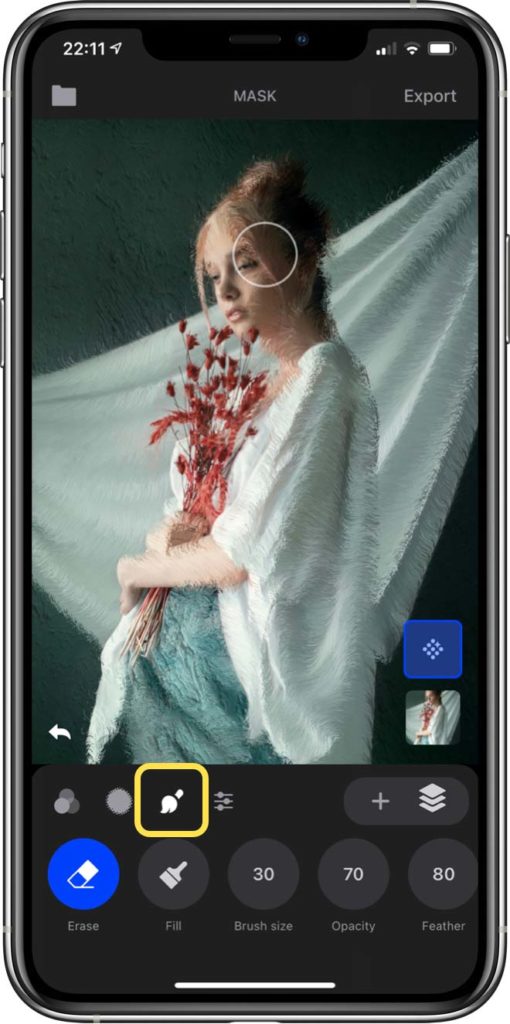
Mask
Like every other layer you can use the mask to erase parts of the layer. Because this is an adjustment layer the brush will erase only the color filter, texture and adjustments applied.
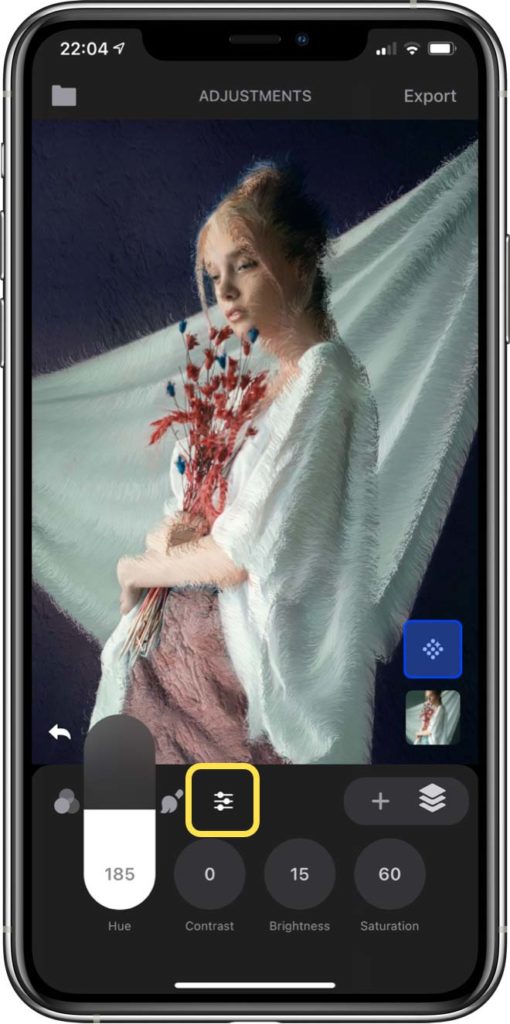
Adjustments
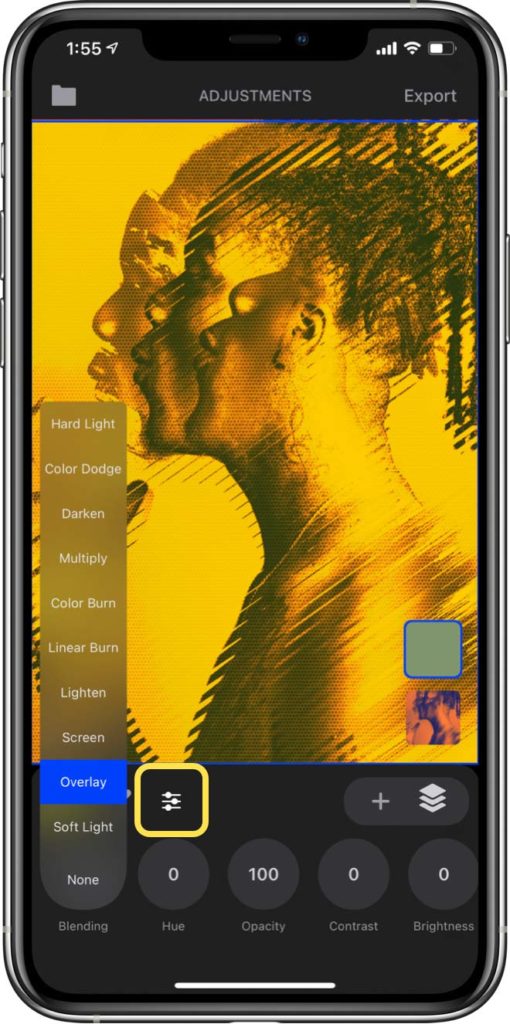
Change the contrast, brightness, saturation and hue of all layers below the current adjustment layer.
With the FX Overlay layer you can add different abstract overlays. The overlays are specially curated and sorted in different categories.
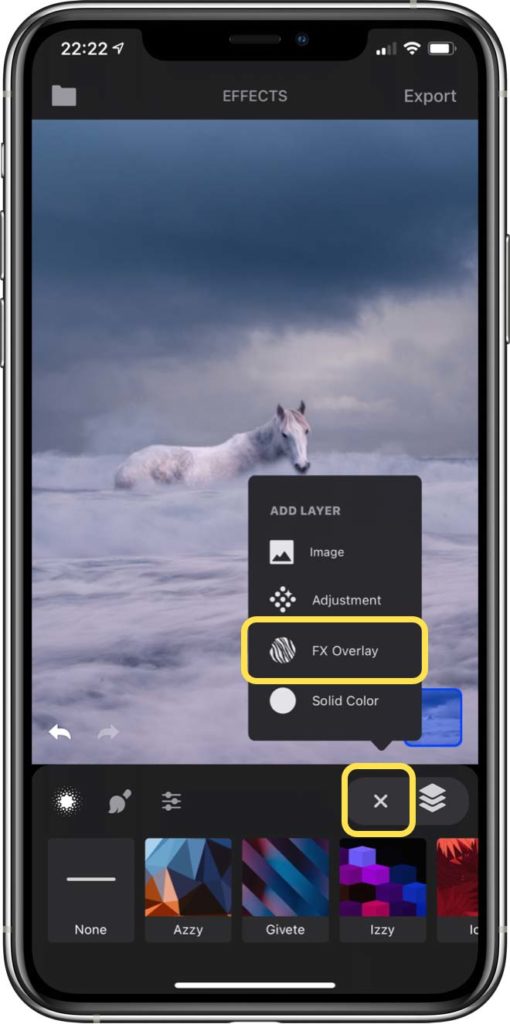
Adding
To add a FX Overlay tap on and then select FX Overlay
. Each overlay comes with predefined adjustment settings which you can preview in the browsing dialog.
When you have chosen an overlay tap done .
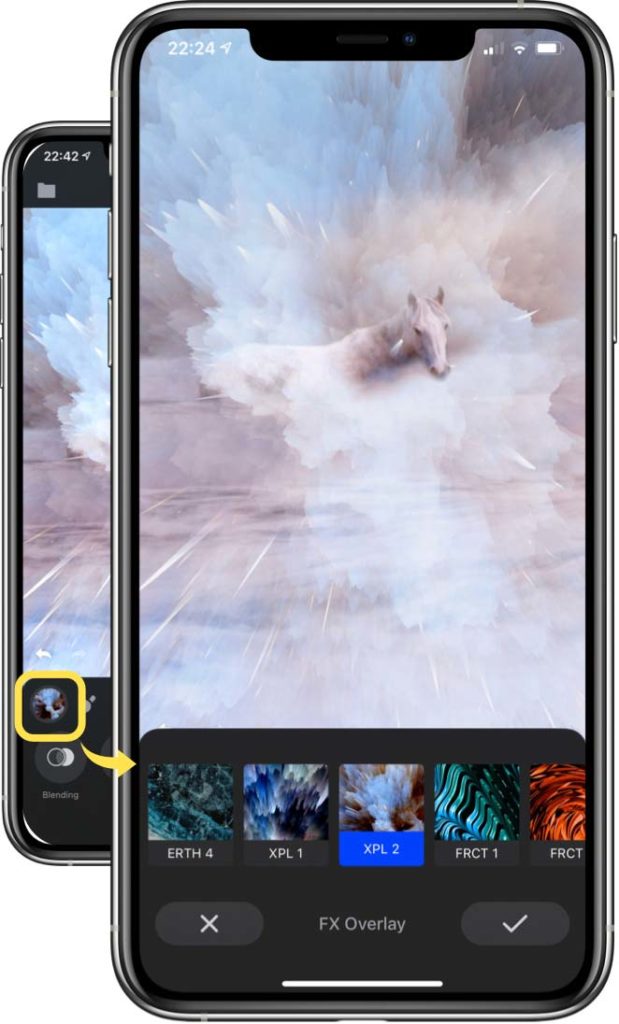
Changing the Overlay
To change the overlay tap on its thumbnail ![]() to open the browse dialog.
to open the browse dialog.
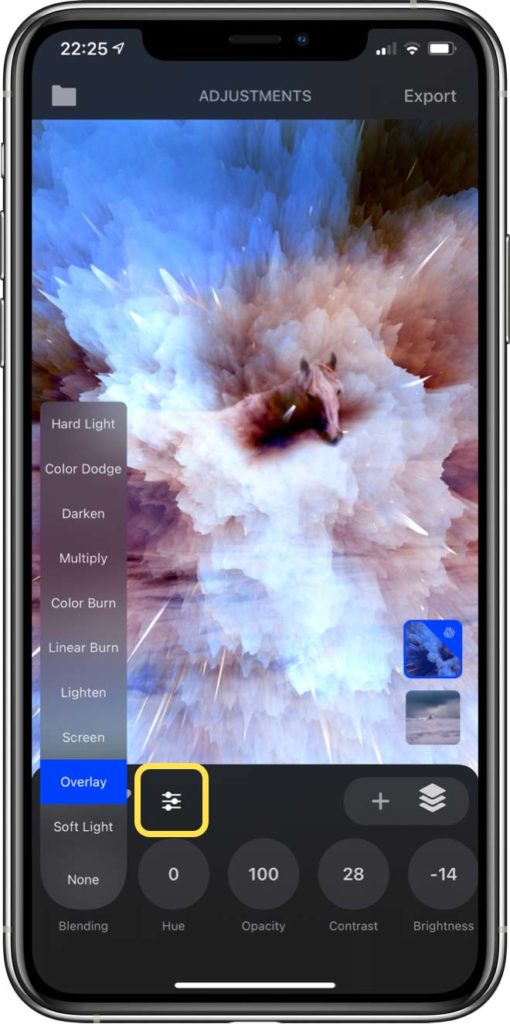
Adjustments
For every overlay there are predefined settings, but you can change them to suite your need.
Mask
Like every other layer you can use the mask to erase parts of the layer.
With the Solid Color layer you can mask out shapes, draw, set backgrounds behind transparent effects and more.
Adding
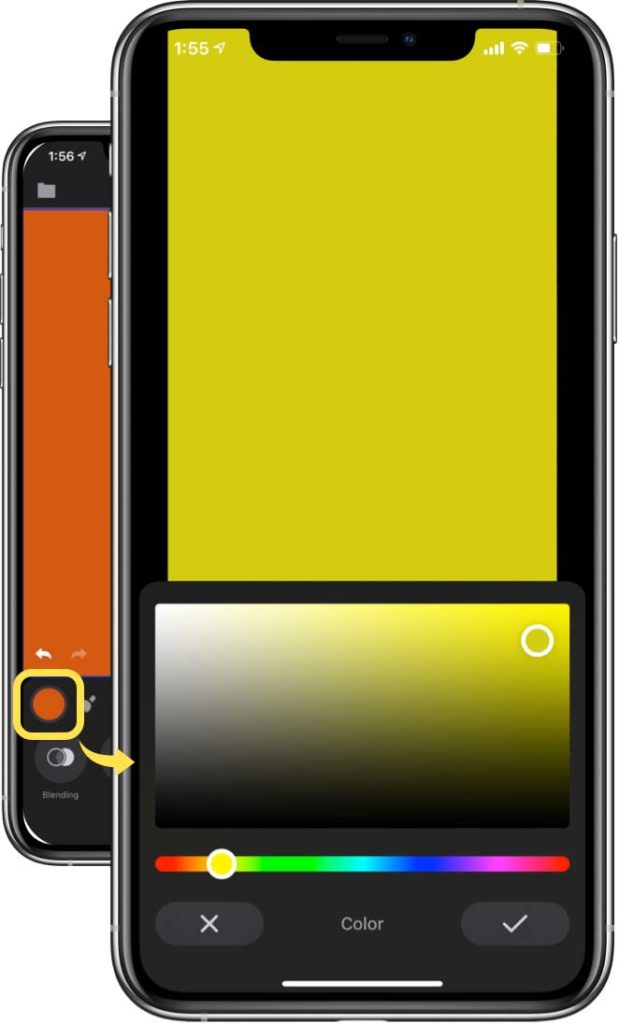
To add a solid color tap on and then select Solid Color
.
When you have picked the color tap .
Changing the Color
To change the color tap on its thumbnail to open the color picker dialog, select the new color and tap done.
Adjustments
The adjustment settings work the same as on an image layer.
Mask
The masking brush works the same as on other layers, but it’s especially useful with the solid color layer. Use the brush to block out shapes or draw.
Exporting Image
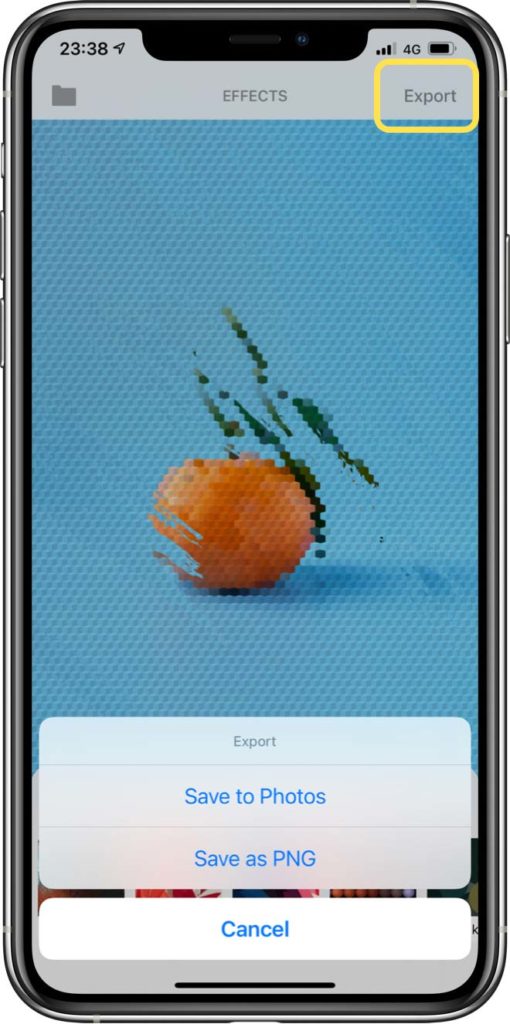
To save an image from the canvas tap on “Export”. You can select from two options to export:
Save to Photos – The image is saved as JPG in your Photos app
Save as PNG – The image is saved as PNG in your Files app.
· If the project was started from blank – you have set the size of the canvas at the start
Saving Project
Trigraphy autosaves your current project when you switch to another app or send it to the background.
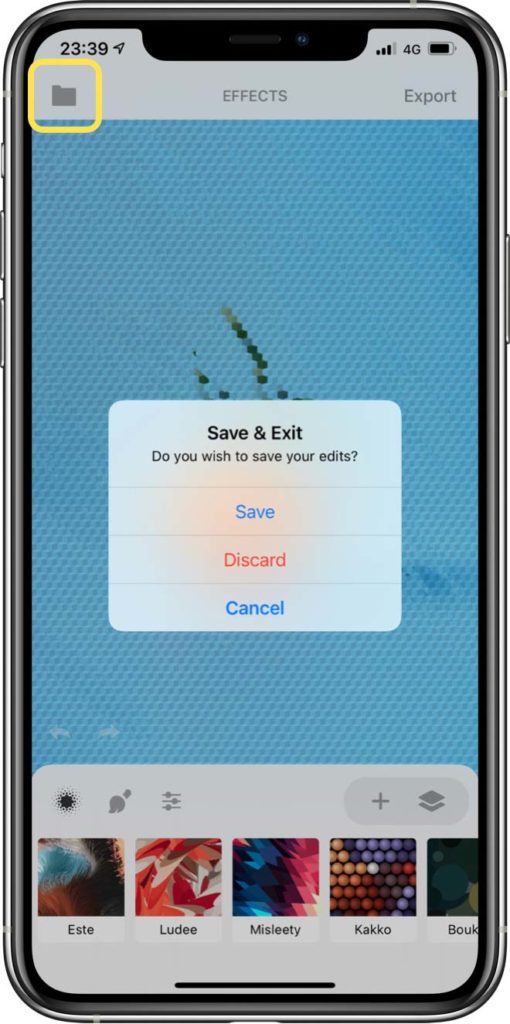
When exiting the editor you can select 2 options:
Save – It will save your new project or overwrite an opened one
Discard – It won’t save your new project or it won’t overwrite the changes made to an opened one
Working with Projects
Your projects are ordered by date. Every time you save a project it will go to the first position in the projects explorer.
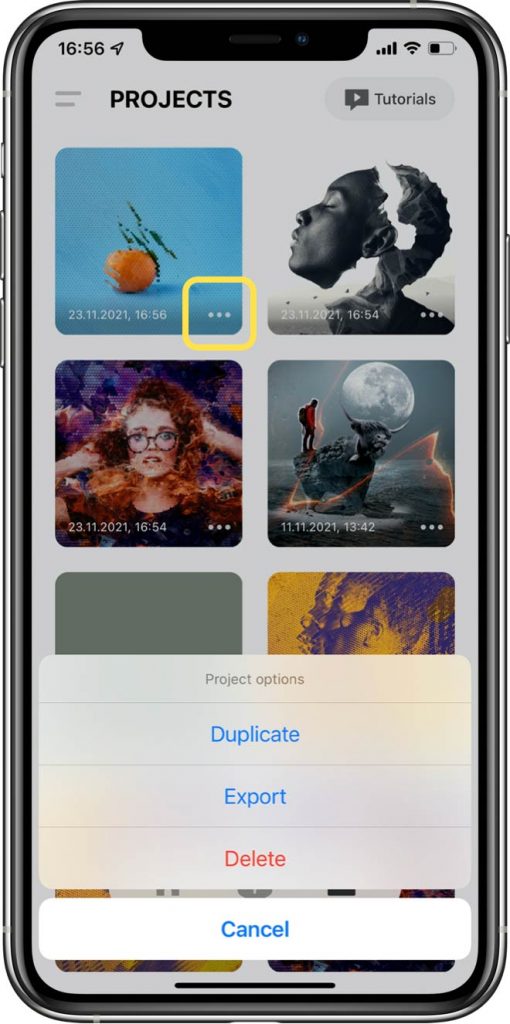
Tap the dots icon to open the project’s options:
Duplicate – Duplicates the project with all the assets in it.
Export – Export the project as .tri files. (You can import it from Files.)
Delete – Deletes the project. This operation is irreversible.
Creating a new project or duplicating requires that your device has at least 1 GB of free storage space. If there’s not enough storage space the operation will not be complete and you will be informed.
There are a bunch of useful links in the about menu. To open the menu tap on .
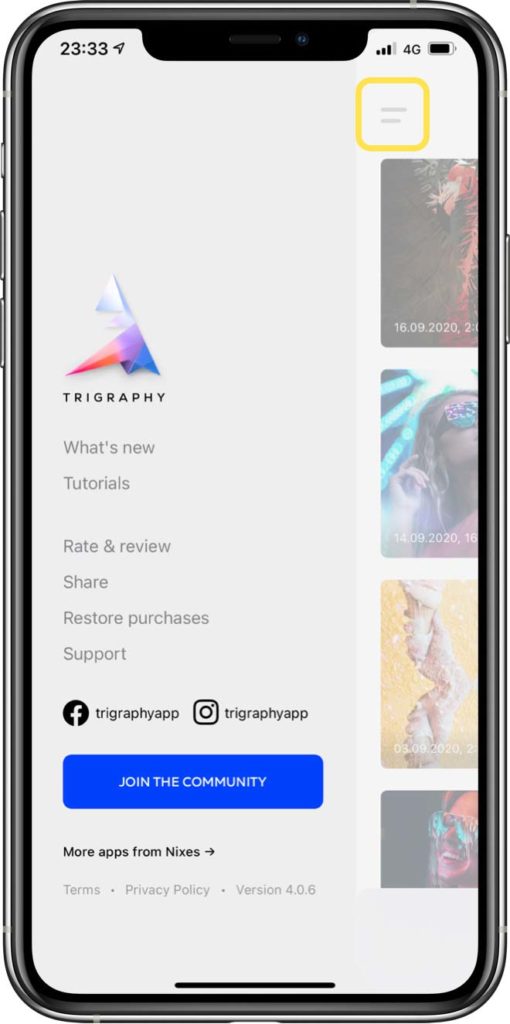
What’s new – Оpens the release notes of the current major version
Tutorials – Оpens the tutorials page
Rate & review – Sends you to the App Store to rate the app and/or leave a review
Share – Copies a link to share the app
Restore purchase – If you have any problems with previous purchases try this
Support – Open the support system where you can write to us and we will do our best to help you
Join the community – Join our Facebook group
Upgrading from monthly to annual subscription
If you wish to save (usually about 50%) you can upgrade your monthly plan to an annual. To do so open the App Store, tap on your profile and tap on Subscriptions. Find Trigraphy, tap it and change your subscription plan. Your plan will take effect on the next billing cycle.
If you have tried and liked the app but don’t want to pay subscription
You can buy the one-time purchase and use the app forever (including all updates). To do so unsubscribe from your current plan (don’t worry your trial will remain if you have one). After the trial expires you will be prompted with the purchase pop-up next time you use the app.
How to unsubscribe
To unsubscribe open the App Store app, tap on your profile (top corner), tap on Subscriptions and find Trigraphy. You can manage your subscription there.How to get a refund
To get a refund you have to report a problem with the in-app purchase to Apple. To learn how to do that follow this link https://support.apple.com/en-us/HT204084
Мore Tips? Watch our Tutorials.
To change which layer is above or below tap and hold a layer’s thumbnail.
Have Questions? Ask us.
To change which layer is above or below tap and hold a layer’s thumbnail.

